Showing posts with label Cleaning Fishing Reels. Show all posts

Thursday, June 12, 2014

How To Sell A Fishing Reel on eBay, or Why You Should Do A Basic Clean of Your Fishing Reels


How To Sell A Fishing Reel on eBay, or Why You Should Do A Basic Clean of Your Fishing Reels

An Essay for Dealers, Flea Marketers, and Anyone Looking to Get the Most Money Out of Their Fishing Reels

Earlier this week I showed you how to clean a fishing reel. Today, I'm going to explain to you WHY you should clean your fishing reels, even if you buy them only to resell.

There is nothing wrong with buying reels to resell them -- I (and every reel collector on earth) would have very few reels in their collections were it not for dealers. Most collectors sell some reels in order to finance the purchasing of others. I guess what I'm saying is that the majority of people who buy fishing reels are also sellers of fishing reels.

Which is why everyone should learn how to do a basic cleaning of their reels BEFORE they sell them. Trust me, you'll maximize your profits, and have happier customers to boot.

I mentioned the new ORCA book Cleaning, Restoring and Repairing Antique Fishing Reels in my post on Tuesday. If you haven't, CLICK THIS LINK and read up on the book, and perhaps buy a copy for yourself or a friend.


A quick proviso: I donated a chapter in this book on using a Vibrasonic machine to clean reels. Neither myself, nor any other writer or ORCA member, makes any money from this book. The profits are donated directly to the non-profit Old Reel Collector's Association.

This is the bible for reel cleaning, and it will walk you through the most basic cleaning techniques, which I went over in my post, to the most advanced. It is full of great information, and that information will bring you much more money if you are selling fishing reels for any reason. Selling reels that have undergone basic cleaning will increase the final price sold for your reels in some cases by 1000%. Here is an example.

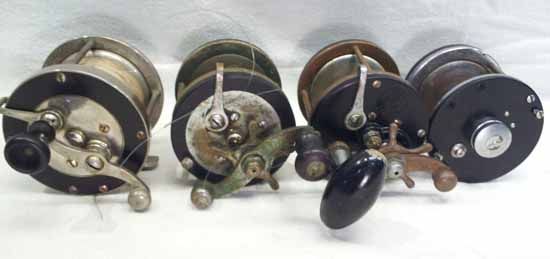
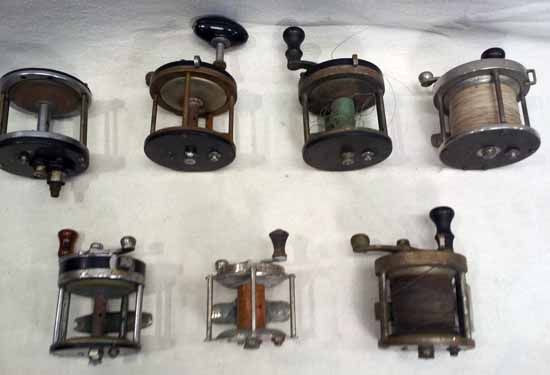
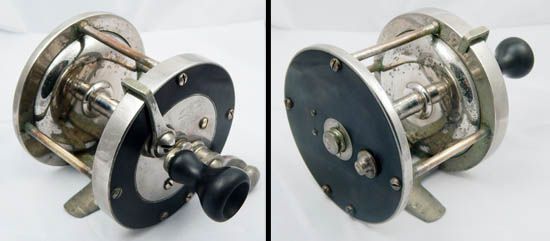
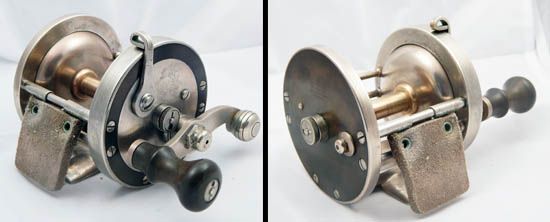
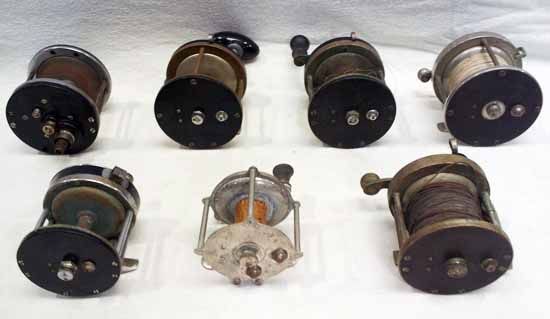
I purchased the following lot of seven fishing reels from a very nice seller on eBay (who shall remain nameless). For these seven reels I paid $25.45 including shipping. One of the reels was an incomplete parts reels (which is, of course, useful to have around) so we will discount that one. This means I paid $4.24 a piece for the six reels.

The seller did nothing wrong with the listing. It was listed in the proper category, had numerous photos that were large and clear, and a sound description explaining what they were offering for sale. The shipping was not outrageous and there was no reserve. The seller had a perfect selling record. All in all, they did everything correct in selling these reels.

Except cleaning them.

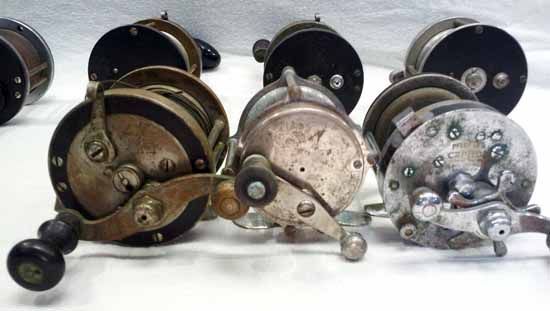
Take a look at some of the pictures from the auction:


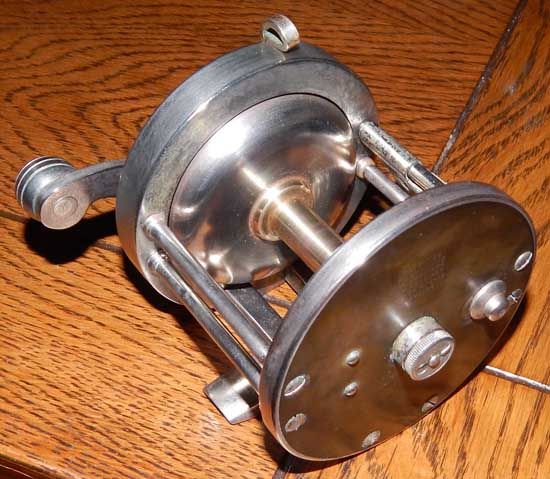
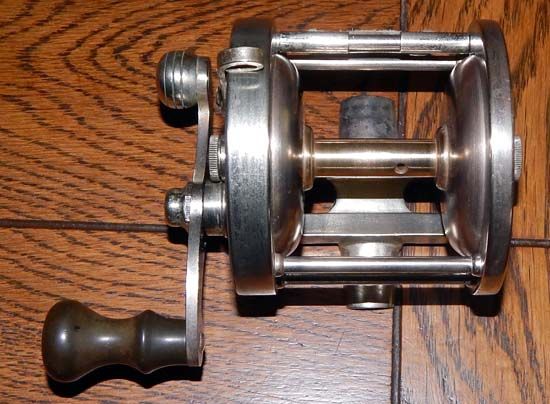
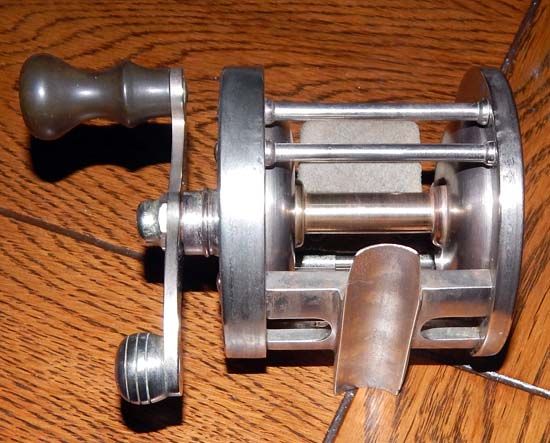
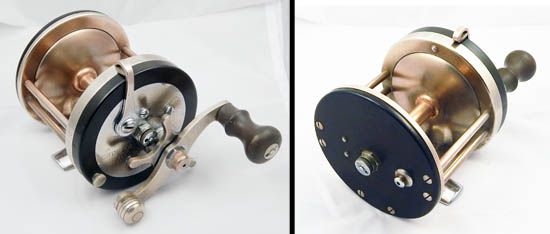
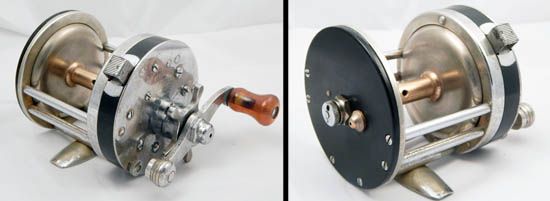
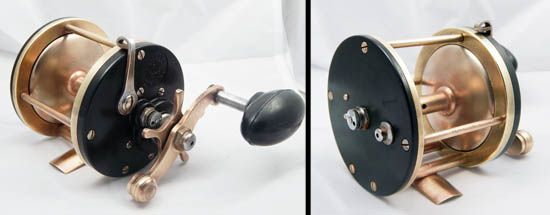
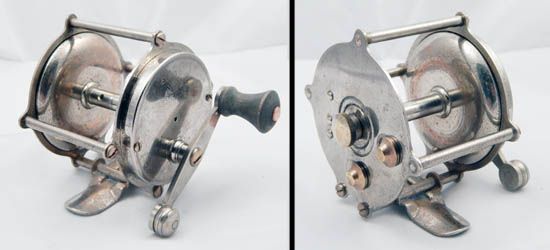
Now, take a look at the exact same reels after a very basic clean up:


Pflueger Capitol 1985 250-Yard


Pflueger Capitol 1985 150-Yard with Amber Pyralin Grasp


Pflueger Oceanic 300 (Patent Pending Model)


Pflueger Oceanic 250 (2nd Model)


Pflueger Ohio 250-Yard Brass with Tri-Pak Aftermarket Handle


Portage Eureka 150-Yard


You can see the difference for yourself. Two of the reels are downright rare (the Oceanic 300 is the only one that was not disassembled, it only received a surface polish), and the other four despite wear ended up looking much, much better.

The total amount of time spent disassembling, cleaning, polishing, and reassembling these reels was 2 hours -- and that includes the one hour spent on just the German Silver 250-yard Oceanic, as outlined in the article on Tuesday. I also cleaned these one reel at a time; had I taken the time to do them all at once, soaking them at the same time, I am sure the amount of time needed would have been cut to less than 90 minutes total. For all six reels.

Do you have 90 minutes? I cleaned these reels while watching sports on TV and talking to my friend on a speaker phone. The act of cleaning them in now way detracted from my enjoyment of either.

Had the original seller spent 90 minutes cleaning these reels, what do you think they could have gotten for them on eBay? I would suggest that a fair assessment is that these six reels (plus the parts reel) would sell for quadruple what they went for -- $100 including shipping. And that's selling at a lot discount; listed individually? A 250-yard Oceanic German Silver sold six months ago for nearly $100 by itself. Say conservatively the two Capitols (one being an unusual size with a great amber knob) bring $25, the Ohio and Eureka and parts reel another $25, the Oceanic 250 at $75 and the Oceanic 300 at $60. That's $185 -- or 6.5X what they brought uncleaned. For ninety minutes of your time.

The point is not that the seller did anything wrong. The point is that if you are interested in making the most money you can from selling reels -- and really, who isn't? -- then you should learn how to properly and quickly clean a fishing reel. Doing so will bring you far greater Return on Investment (ROI) and put a lot of extra money in your pocket.

And the best way I know to learn how to do is by buying the ORCA book mentioned above.

One final note. Just like you can make a lot of extra money properly cleaning a reel before you sell it, you can destroy the value of a reel by cleaning it incorrectly. The article "An Appeal for Restraint" in the aforementioned ORCA book gives the best guidelines I have ever seen on when and how much to clean a valuable reel -- yet another reason you need to own the book.

-- Dr. Todd

Tuesday, June 10, 2014

Dr. Todd Restores A Fishing Reel … Or How To Clean Fishing Reels for Dummies


Dr. Todd Restores A Reel … Or How To Clean Fishing Reels for Dummies

Cleaning reels is easy. Like REALLY easy. So easy, in fact, it is rather astounding that more collectors (and dealers) don't do it. It really does not not take a lot of time or money to turn what is in many cases a worthless $5 junk reel into something of real value -- and the best part is that we now have a bible for reel cleaners and restorers. Whether you're cleaning your first reel, or you are restoring the hard rubber plate on a $3000 vom Hofe, the new book Cleaning, Restoring and Repairing Antique Fishing Reels, published by the fine folks at ORCA, is an absolute MUST HAVE, even if you only buy reels to resell them.


To show you how easy it is to turn a junker into a beauty that any collector would be proud to display, I am going to walk you through the process from start to finish -- as it is outlined in a chapter by Dr. John Elder in the aforementioned book. I am going to add a twist of my own, simply because I am an absent-minded professor about 98% of the time and often forget how to put reels back together. I developed an easy-to-use trick if, like me, you sometimes forget how reels go back together.

So let's start with the candidate reel. I am working on a documentary film about the Pflueger Supreme reel, and as ancillary part of the research, I needed to find a couple of Pflueger Oceanic Free Spool reels in order to photograph their Case-patent free spool mechanism. I was not looking forward to spending the $150 or so necessary to acquire the two early models I needed, but as luck would have it, I found a lot of 7 "beater" reels on eBay that had not one but both of the Oceanics I needed (the first generation "Patent Pending" 300-yard and the 250-yard second model). Trouble was, they were in absolutely awful condition, which explains how I was able to purchase the entire lot for $25.45 including shipping.


The 250-yard Oceanic is on the left in this auction photo, with the free spool lever put on backwards. As you can see, it looked terrible.

How awful? When it arrived I snapped some photos of it to show just how much corrosion and gunk had accumulated on this reel.
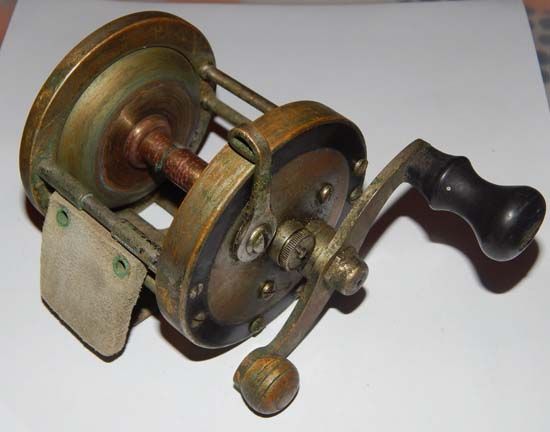
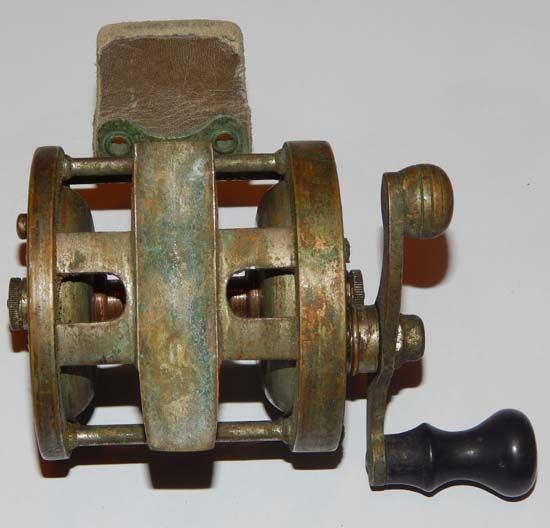
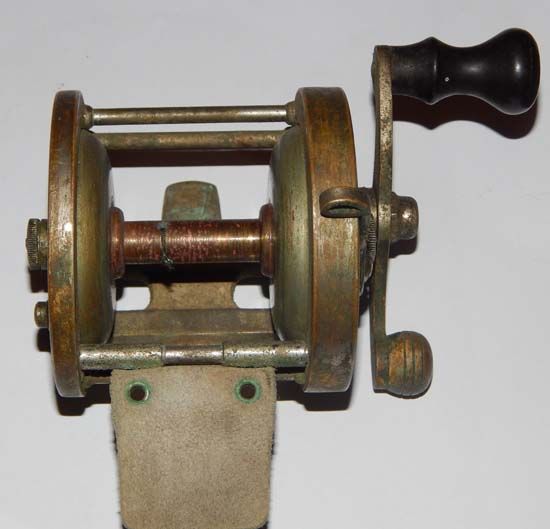
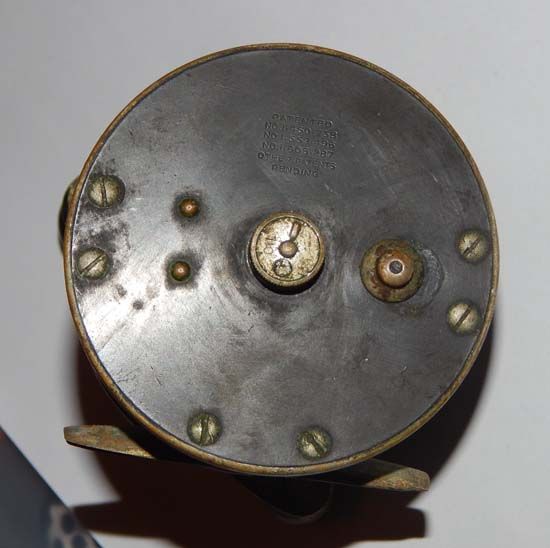


First thing I did was put the free spool lever back on the right way. An honest question -- looking at this reel, do you think you could get $10 at a flea market for it? If you could, you are a better salesman than anyone I know.

But knowledge is a good thing. Many of these early saltwater surf reels were built much better than we give them credit for, and could survive some significant abuse. I knew that Oceanics in their early permutation were German Silver, meaning that they avoided the pitting from corrosion better than nickel plated reels. The reel worked poorly, with a weak click. I knew that the fact it did not run well was likely due to an internal build up of gunk. It would have to be cleaned inside and out.

Since I needed this reel for the film, it had to be cleaned, because if there is one thing my ORCA friends HATE more than anything is dirty reels being used to illustrate points on reel history, I knew I had to clean this baby up the best I could. So I consulted the Cleaning, Restoring and Repairing Antique Fishing Reels book chapter by Dr. Elder and procured the necessary items for a thorough reel cleaning:

1) Vinegar

2) 0000 Steel Wool

3) Mineral Spirts

4) Metal polish (I am partial to Maas)

5) Gunsmithing screwdrivers

A tupperwear container, some old toothbrushes, and an old t-shirt rounded out the list of necessary items.

THAT'S IT. Literally, these were the tools I used to clean the Pflueger Oceanic pictured in this article.

* * * * * * * * * * * * * * *


STAGE ONE: Disassembly

A word on screwdrivers -- I strongly suggest anyone who collects vintage tackle buy a set of gunsmithing screwdrivers. I can't overestimate the importance. I am partial to Chapman screwdrivers, with interchangeable heads. A simple set costs $30 and has 20 heads that will fit almost anything you come across. The worst possible thing you can do is bugger a screw; there is lots of good information on how to avoid this in the aforementioned book.

Luckily, I had the correct size head for the screws on this reel. But as I mentioned I often forget where parts go in a reel, so I've developed to the following fool-proof method of disassembling a fishing reel.

First, take a good digital photo of the reel, front and back. Then print out as large a photo as your printer will allow, like so:
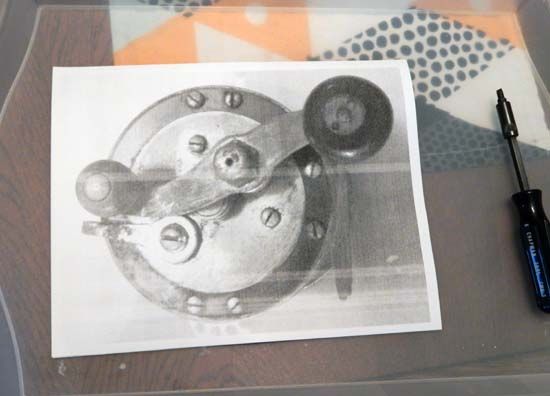


Then, take a pen and mark all the pieces you will be taking off the front plate of the reel with a number. Then simply take off each piece one by one, and tape it to the corresponding place on the photo like so:
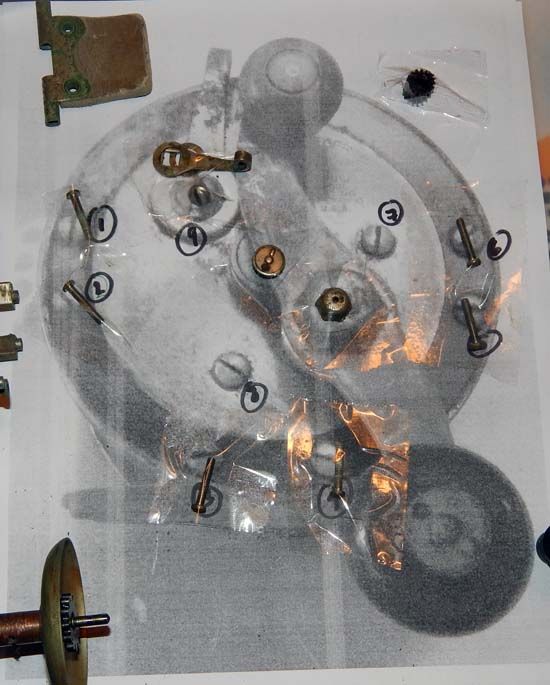


Yep. Simple as that. You'll never forget what screw goes where. I know what you're thinking: why didn't' I think of that? Simple answer: you need to dunce up a lot of reels to come up with something this ingenious.

Anyway, since one of the screws holding the end plate to the foot was "frozen" I left that piece on, knowing that the "soak" would help me to remove the screw later.
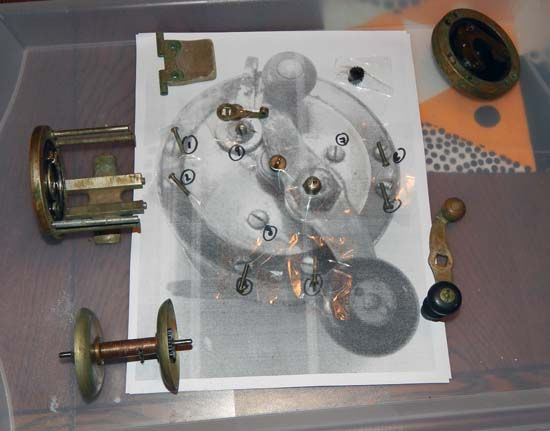


The soak is simple: 50% vinegar and 50% water. That's it. Put your 50-50 mixture in a tupperware container and then place the reel parts in it, put the top on it, and wait overnight.

Total elapsed time spent on cleaning this reel so far: 20 minutes.

* * * * * * * * * * * * * * *


STAGE TWO: Cleaning

You can soak your reel for as little as four hours and for as long as 24; the book gives a variety of opinions on the subject. I soaked for 12 hours and then in a sink full of hot water (and TWO drain catches in case something valuable fell out) I put the reel parts, and carefully using 0000 steel wool, began to scrub the Oceanic. The vinegar did its job beautifully, lifting dirt and gunk from the tiniest of cracks and preparing the corrosion on the spool and face and end plates for cleaning.

By the way, it is the experience of the authors of the ORCA book that vinegar will not harm hard rubber.

0000 steel wool is perhaps the greatest cleaning tool you can have. It's so fine it won't leave scratch marks, but rough enough to take off the corrosion and layers of oxidation built up over years of use in saltwater.

For internal cleaning, Dr. Elder recommends a fine wire brush, but I find a toothbrush is a great tool. I use Dawn dishwashing soap and an old toothbrush to scrub the gearing and the internal of the reel. I find this is usually sufficient to clean the reel, but if there is stubborn gunk, Dr. Elder recommends a bath in mineral spirits, which would be the same process as the vinegar-water soak (and like your 50-50 solution, is completely reusable).

After an initial scrubbing with the steel wool, this is what the parts looked like:
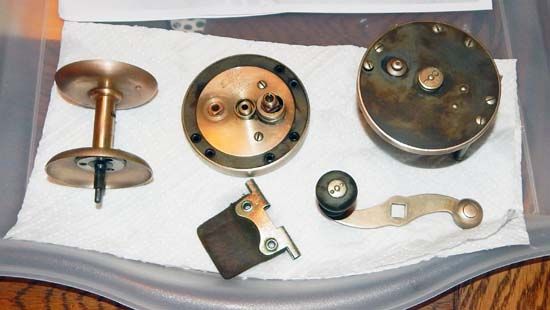


Time spent on this stage: 15 minutes. Total elapsed time spent on cleaning this reel so far: 35 minutes.

* * * * * * * * * * * * * * *


STAGE THREE: Polishing and Reassembly

Now comes the polishing. Taking each of the parts from the soak, thoroughly dry them with some paper towels, and let them sit for a few hours (if you are impatient you can put them on a tray on a food dehydrator which will use gentle air and warmth to dry them in about 15 minutes).

Once dry, begin to polish the individual parts with Maas (or whatever metal polish you prefer). DON'T OVERPOLISH. In my opinion your goal is NOT to make it look brand new, but to make it look like a clean fishing reel that can be taken out and fished. So I don't try to polish until it has a mirror finish although you are welcome to do so if you desire.

Since the soak had loosened the stubborn screw on the back plate, I used the photo of the back plate and taped all the screws to the photo so I knew where they came from, and completely disassembled the reel. This allowed me, for example, to more thoroughly polish the pillars and the foot, which were far easier to do loose than when attached to the end plate. Then taking each screw I cleaned them individually (the easiest way is to take a piece of cloth and a tiny bit of polish and "screw" it into the cloth using the screwdriver -- this cleans the entire screw very effectively).

Here is where your "road map" photo will come in handy. Using the photos with the parts taped to them, after cleaning each screw, replace it back to the exact place where it came from on the reel. It's remarkably easy and you'll never have the problem of the wrong screws (that look alike) going in to the wrong part of the reel ever again.

Reassembly is a snap. It is rather shocking how different the reel appears even at this stage.
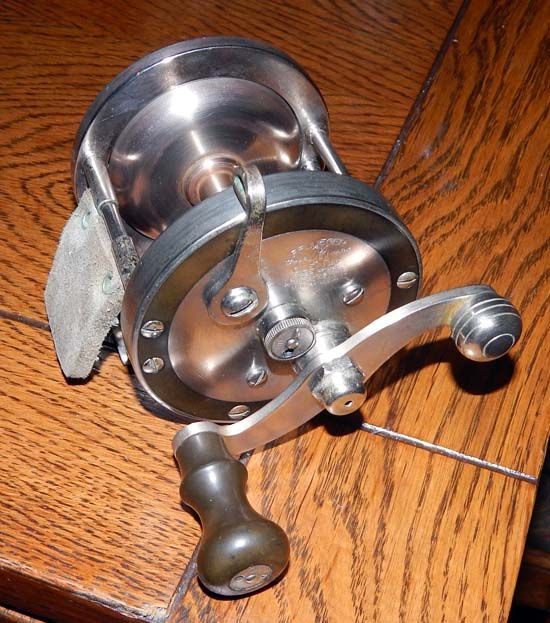


Time spent on this stage: 15 minutes. Total elapsed time spent on cleaning this reel so far: 50 minutes.

* * * * * * * * * * * * * * *


STAGE FOUR: Final polishing

The last stage is the final polishing one, which is to take the assembled reel, and using a cloth and tiny amount of polish, to do a thorough and final job of going over the reel one last time.

Once this is done, take a clean cloth and go back over the reel about three or four times. Make sure to clean the spool by putting a cloth on it and reeling it for a minute or so. The polish should all be gone now, and you'll have a reel that looks like this:
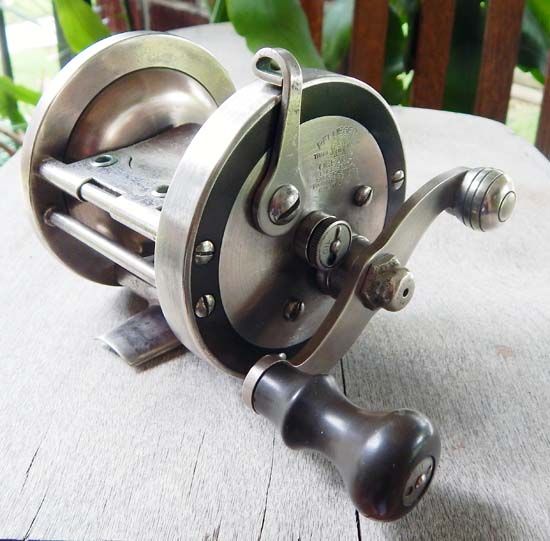
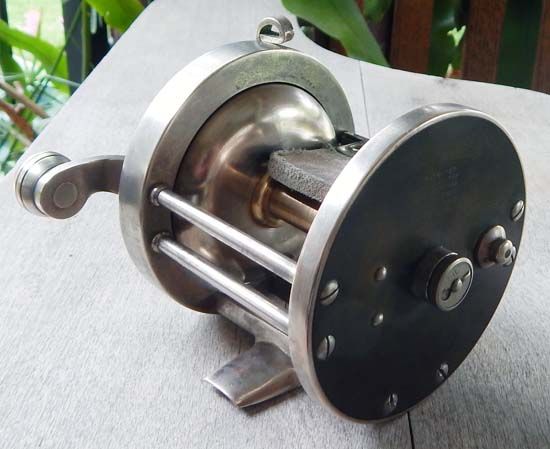
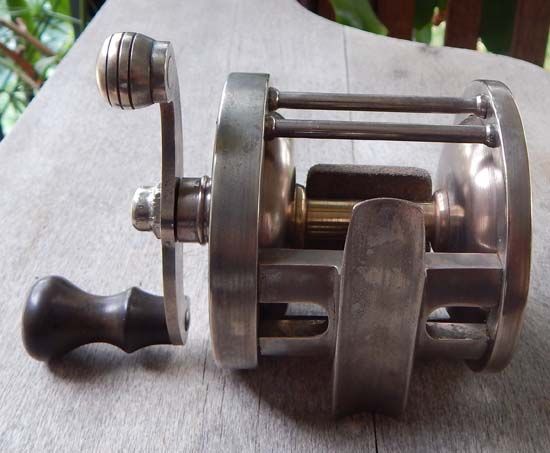


Time spent on this stage: 10 minutes. Total elapsed time spent on cleaning this reel so far: 60 minutes.

* * * * * * * * * * * * * * *


So that's it. A reel you wouldn't spend $5 on now would not look out of place on any collector's shelf. The transformation is rather remarkable, and is just so incredibly easy I can't believe every collector or dealer doesn't do it.
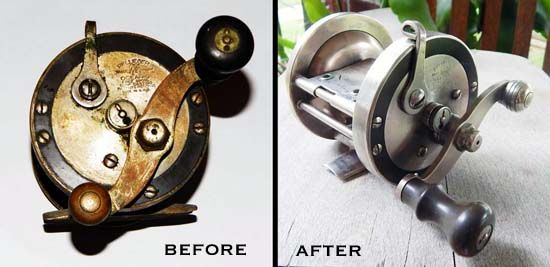


There's still a little work left to do; I always wait a week before disassembling the reel again and greasing and oiling it, just to make sure that it is completely dry. Then I take a clean cloth and give it one more polish. In this case, since it had an aftermarket leather thumb drag, I will also restore the leather as well as it can be, but that is it.

I hope you'll see how easy this was. The Cleaning, Restoring and Repairing Antique Fishing Reels book is about the only manual you'll ever need on the subject, and I hope everyone interested gets a copy. An hour of your time will do wonders to just about any reel.

Additionally, check in tomorrow -- we'll have a special announcement about reel cleaning.

-- Dr. Todd

PROVISO: The rarer and more valuable a reel, the more care that is necessary to clean it. Don't use steel wool on a fine Kentucky reel, for example. If you have a rare reel, or have any difficulties cleaning your reel, please post to the ORCA Reel Talk "Cleaning" forum. To visit the forum and ask a question, Click Here.
Wednesday, October 8, 2008

Dr. Todd Cleans A Fishing Reel, Part I: Vibrasonic Baby!

Dr. Todd Cleans a Fishing Reel,
Wherein the Intrepid Author Shows the Novice Reel Collector How to Clean a Fishing Reel

Part 1: Vibrasonic Baby!

One of the banes of reel collecting is the fact that so many of the collectible reels out there have been abused by the angler; now, this is not one of the epistles about how everything has to be "mint" or a lament that anyone would have the temerity to take out a piece of fishing tackle and actually fish with it. However, of all the items in the angler's kit, the average American angler--both past and present--took very little care of their fishing reels. If you don't believe me, peruse the vintage reel selection on eBay.

Most of this damage could have been avoided if the original owner had taken a few simple steps, such as cleaning the reel after use, properly oiling it, drying it when it got wet, not dropping it in the mud, etc. The hard truth is, however, that their carelessness can be your benefit. Many reels that would sell for far more can be found at a bargain, and with some time and effort, can be restored.

In the coming months I am going to walk you through a number of ways in which you can clean a fishing reel. Keep in mind I am no expert and if you've got some time, I strongly recommend you wade through the discussion on ORCA's Reel Talk Cleaning & Restoration Forum about the nature of cleaning a reel. Keep in mind, not all reels should be cleaned, and that it is always best to start with a low-end model before attacking that Frederick vom Hofe.

There are multiple methods to clean reels. Today we are going to go over the Vibrasonic method--which uses ultra fast vibrating liquid to remove any debris, dirt, gunk, etc. from a particular item. I purchased a small vibrasonic tank from eBay for something like $30, but they run the full gamut of prices.

I decided to test the Vibrasonic on a Montague trade reel marked "Waterwitch" that was pretty scummed up by years of use. The handle knob was frozen, the gears could barely turn, and had hardened gunk (probably dried grease) on the spool. Overall on an ORCA grading scale it rated about a 3/3.

This was a Sears, Roebuck & Co. trade reel that sold in the 1920s for $2.95, making it about 80 years old. Not an expensive model to begin with, the years had not been kind to this model, and so despite reasonable photographs from eBay, I was able to purchase it for under $5.


When I got it in the mail I was certain it could be restored, as it seemed to have no major damage (dents, broken gears, missing pieces, etc.). So I set out to restore it and decided to use the vibrasonic tank to clean the reel.

Like all cleaning, you start with disassembly. The best investment any reel collector (or lure collector for that matter) can have is a fine set of gunsmithing screwdrivers. I love Chapman screwdrivers as the heads are not tapered, and thus can help avoid major problem problems such as buggered screw heads, scratches, etc. They make interchangeable heads of all sizes.

Anyway, back to the Waterwitch. After disassembling, I ran the pieces under water and used an old toothbrush to remove as much of the gunk as I could, both inside and out. Then, it was into the vibrasonic tank with the pieces, making sure they were not touching so as to avoid any scratching.


This small tank fit the pieces of a disassembled baitcaster perfectly; larger reels would stick out and require flipping the pieces to get the desired effect.


Unit with the lid closed.

The unit has several benefits; first, it uses tapwater. I chose to run it with hot tapwater to help loosen the grime, and it seemed to work nicely. Second, it has an automatic shut off mechanism that runs in a three-minute cycle. I ran it for five cycles for 15 minutes of vibrating goodness. Then I took out the pieces, ran them under warm water to clean off any last debris, and dried them. Then I cleaned out the vibrasonic tank (do NOT forget to do this).


Here is how the pieces came out of the vibrasonic tank, after a quick scrub under hot water.

After the pieces dried, all that was left to do was to put a coat of Goddard's (make sure you use only a non-caustic metal polish; if you don't believe me I dare you to read this) and reassemble the reel. Here are the results:


Pretty nice, if you ask me. The reel will never pass as mint, but you would never be ashamed of having a reel that looks like this in your collection. And since its a fairly scarce Sears trade reel, I would not have hesitated to pay $30 or more for one in this condition if I didn't already have it. Instead, a $5 investment and an hour of work got me the same reel. Plus, it has the additional benefit of being squeaky clean inside and out--and runs like a top. One side benefit is that the handle knob--which was frozen tight like so many reels you find--now spins cleanly too. That vibrating water gets in almost everywhere!

It doesn't take many cleaned reels like this to make up for the price of a vibrasonic cleaner--depending on how much you pay, of course. Some vibrasonic tanks can cost several hundred dollars and I imagine work even better than the bargain unit I bought. I've used it on a dozen reels so far with good results; the best results have been on nickel-plated reels such as this. Plus you can clean your eyeglasses with it (you can't believe how dirty they are until you've cleaned them once in a vibrasonic tank).

So in my opinion, the vibrasonic tank works best with nickel-plated baitcasters. It did not appear to do any harm to the bakelite handle knob, and I have cleaned a few bakelite sideplates in it with no noticeable damage. Make sure the stainless tank on your vibrasonic is squeaky clean before putting any items in it. Always use the plastic basket so that the metal parts do not scratch the tank and vice versa. I cleaned the gears in the tank but not the screws (which I cleaned by using a screw driver to "tighten" them into a clean rag, which cleaned the threads nicely of old grease).

As a proviso, keep in mind this is only a guide and the author accepts no responsibility for any damage done cleaning a fishing reel based on the method(s) described.

-- Dr. Todd